The first thing we need talk about is service mesh. A service basically is the microservices that makes up an application. A modern cloud native application will contain a number of containers that handle functionality for a different part of an application. For example, a book selling website might have product page, reviews, book information details, rating etc. Each part of the application will typically be in it’s own container and will need to interact with other containers that make up the overall application. A service mesh technology such as Istio will handle service discovery and traffic management between the microservices as well as provide ingress gateway capability.
Components of Istio
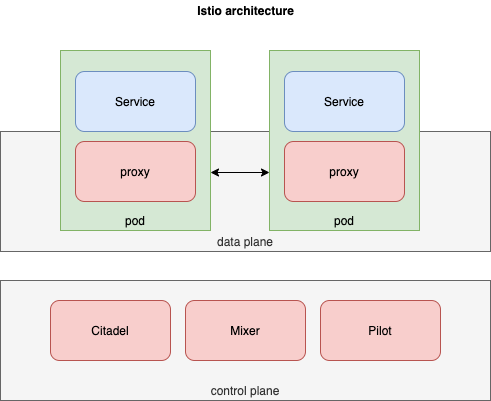
The components of Istio can be broken into data plane and control plane.
In the data the plane Istio uses side car proxy called Envoy proxy
-
Envoy proxy
Each deployed service or application in Kubernetes gets deployed with a side car proxy. Envoy is layer 7 proxy that takes care of the following functionality;
- Dynamic service discovery
- Load balancing
- TLS termination
- Health checks
- Staged rollouts
- Fault injection
Pilot, Citadel and Mixer provide the control plane functionality in Istio. These collectively make make up the Istiod.
-
Pilot
Pilot in Istio provides control plane functionality and is resposible for sending configuration to the side car proxy. It allows for;
- Service discovery
- Intelligent routing and
- Resiliency
-
Citadel
Citadel takes care of user authentication and also is the certificate store. It provides,
- User authentication
- Credential management
- Certificate management
- And traffic encryption
-
Mixer
Mixer handles access control, it provides the authorization functionality within Istio. When authentication is successful, Mixer ensures whether the appropriate authorization is met.
Installing and configuring Istio with Kubernetes
To get kick started you will need an already configured and functional Kubernetes cluster. For development purposes you can also use Minikube. I am using a single node microk8s running in Ubuntu 20.04 running an EC2 in AWS.
Download Isitio
We first need to grab Istio from it’s github page. To get the latest stable release of Istio, run the following in your terminal.
curl -L https://istio.io/downloadIstio | sh -If there is a require download a specific version, you can add a variable on the command line. For example, to download Istio 1.4.3, you would run
curl -L https://istio.io/downloadIstio | ISTIO_VERSION=1.4.3 sh -Move to the Istio package directory. For example, if the package is istio-1.6.2:
cd istio-1.6.2The installation directory contains:
- Sample applications in
samples/ - The
istioctlclient binary in thebin/directory.
Add the istioctl client to your path (Linux or macOS): This will allow us to call the istioctl binary when in terminal.
export PATH=$PWD/bin:$PATHSoftware versions used
Kubernetes and Istio are going through a continous development, at the time of writing this, I was using the following versions of Kubernetes and Istio.
Kubernetes
Client Version: version.Info{Major:"1", Minor:"18", GitVersion:"v1.18.3", GitCommit:"2e7996e3e2712684bc73f0dec0200d64eec7fe40", GitTreeState:"clean", BuildDate:"2020-05-20T12:52:00Z", GoVersion:"go1.13.9", Compiler:"gc", Platform:"linux/amd64"}
Server Version: version.Info{Major:"1", Minor:"18", GitVersion:"v1.18.3", GitCommit:"2e7996e3e2712684bc73f0dec0200d64eec7fe40", GitTreeState:"clean", BuildDate:"2020-05-20T12:43:34Z", GoVersion:"go1.13.9", Compiler:"gc", Platform:"linux/amd64"}
Istio
Istio
no running Istio pods in "istio-system"
1.6.2
Install Istio
First off let’s see what our current pods look like.
$ kubectl get pods --all-namespaces
NAMESPACE     NAME                                              READY   STATUS    RESTARTS   AGE
kube-system   coredns-588fd544bf-n9lwx                          1/1     Running   0          6m37s
kube-system   dashboard-metrics-scraper-db65b9c6f-4zx7x         1/1     Running   0          6m40s
kube-system   heapster-v1.5.2-58fdbb6f4d-hgx27                  4/4     Running   0          6m40s
kube-system   kubernetes-dashboard-67765b55f5-b48fs             1/1     Running   0          6m40s
kube-system   monitoring-influxdb-grafana-v4-6dc675bf8c-qrzhr   2/2     Running   0          6m40s
Next we will install Istio with the demo profile, once Istio is installed we should see that it will get namespace created along with the relevant pods to ensure Istio does what it does.
The demo profile YAML file can be found in istio-1.6.2/manifests/profiles/demo.yaml. Changes can be made to this if one wishes to do so before deploying Istio in to Kubernetes.
Now let’s go ahead and install Istio;
$ istioctl install --set profile=demo
Detected that your cluster does not support third party JWT authentication. Falling back to less secure first party JWT. See https://istio.io/docs/ops/best-practices/security/#configure-third-party-service-account-tokens for details.
✔ Istio core installed
✔ Istiod installed
✔ Egress gateways installed
✔ Ingress gateways installed
✔ Addons installed
✔ Installation complete


$ kubectl get pods --all-namespaces

NAMESPACE      NAME                                              READY   STATUS    RESTARTS   AGE
istio-system   grafana-54b54568fc-sndmg                          1/1     Running   0          6m17s
istio-system   istio-egressgateway-765f77ff94-885r2              1/1     Running   0          6m18s
istio-system   istio-ingressgateway-85bcfb5c74-hlqd6             1/1     Running   0          6m18s
istio-system   istio-tracing-9dd6c4f7c-gjgq9                     1/1     Running   0          6m17s
istio-system   istiod-d754b48bd-lfc9w                            1/1     Running   0          6m33s
istio-system   kiali-d45468dc4-gv2qx                             1/1     Running   0          6m17s
istio-system   prometheus-756f8c9898-v7r82                       2/2     Running   0          6m17s
kube-system    coredns-588fd544bf-n9lwx                          1/1     Running   0          15m
kube-system    dashboard-metrics-scraper-db65b9c6f-4zx7x         1/1     Running   0          15m
kube-system    heapster-v1.5.2-58fdbb6f4d-hgx27                  4/4     Running   0          15m
kube-system    kubernetes-dashboard-67765b55f5-b48fs             1/1     Running   0          15m
kube-system    monitoring-influxdb-grafana-v4-6dc675bf8c-qrzhr   2/2     Running   0          15m
The default Istio installation uses automatic sidecar injection. We will use the default namespace for our sample application and as such we will label this with istio-injection=enabled
$ kubectl label namespace default istio-injection=enabled
namespace/default labeled
Next, we will deploy our sample application that came with Istio download.
$ kubectl apply -f samples/bookinfo/platform/kube/bookinfo.yaml
service/details created
serviceaccount/bookinfo-details created
deployment.apps/details-v1 created
service/ratings created
serviceaccount/bookinfo-ratings created
deployment.apps/ratings-v1 created
service/reviews created
serviceaccount/bookinfo-reviews created
deployment.apps/reviews-v1 created
deployment.apps/reviews-v2 created
deployment.apps/reviews-v3 created
service/productpage created
serviceaccount/bookinfo-productpage created
deployment.apps/productpage-v1 created
We are now going to validate that all services and pods are defined and running.
$ kubectl get services
NAME          TYPE        CLUSTER-IP       EXTERNAL-IP   PORT(S)    AGE
details       ClusterIP   10.152.183.205   <none>        9080/TCP   49s
kubernetes    ClusterIP   10.152.183.1     <none>        443/TCP    16m
productpage   ClusterIP   10.152.183.245   <none>        9080/TCP   48s
ratings       ClusterIP   10.152.183.161   <none>        9080/TCP   49s
reviews       ClusterIP   10.152.183.7     <none>        9080/TCP   49s

$ kubectl get pods
NAME                              READY   STATUS    RESTARTS   AGE
details-v1-6c9f8bcbcb-vbqb5       2/2     Running   0          2m31s
productpage-v1-7df7cb7f86-rmm4s   2/2     Running   0          2m31s
ratings-v1-65cff55fb8-jvvhj       2/2     Running   0          2m30s
reviews-v1-7bccdbbf96-5j77w       2/2     Running   0          2m31s
reviews-v2-7c9685df46-mnpdl       2/2     Running   0          2m31s
reviews-v3-58fc46b64-46w6s        2/2     Running   0          2m31s
This looks good so far!
Let’s send curl command via kubectl to the booking application to make sure it is running.
$ kubectl exec -it "$(kubectl get pod -l app=ratings -o jsonpath='{.items[0].metadata.name}')" -c ratings -- curl productpage:9080/productpage | grep -o "<title>.*</title>"
<title>Simple Bookstore App</title>
Looks like curl successfully got result back from the application.
Now let’s make sure our application is accessible from outside of Kubernetes. To do this we will need to deploy an Istio gateway.
$ kubectl apply -f samples/bookinfo/networking/bookinfo-gateway.yaml

gateway.networking.istio.io/bookinfo-gateway created
virtualservice.networking.istio.io/bookinfo created
Now we are going validate that there are no issues with the configuration
$ istioctl analyze
✔ No validation issues found when analyzing namespace: default.
Looks like things are going well so far, we now need to find out the ingress IPs and ports
export INGRESS_PORT=$(kubectl -n istio-system get service istio-ingressgateway -o jsonpath='{.spec.ports[?(@.name=="http2")].nodePort}')

export SECURE_INGRESS_PORT=$(kubectl -n istio-system get service istio-ingressgateway -o jsonpath='{.spec.ports[?(@.name=="https")].nodePort}')

$ echo $INGRESS_PORT
30497
$ echo $SECURE_INGRESS_PORT
32479
Let’s do a quick curl test to the ingress and validate we can access the page.
$ curl http://127.0.0.1:30497/productpage
<!DOCTYPE html>
<html>
<head>
<title>Simple Bookstore App</title>
<meta charset="utf-8">
<meta http-equiv="X-UA-Compatible" content="IE=edge">
<meta name="viewport" content="width=device-width, initial-scale=1.0">
<!-- Latest compiled and minified CSS -->
<link rel="stylesheet" href="static/bootstrap/css/bootstrap.min.css">
<!-- Optional theme -->
<link rel="stylesheet" href="static/bootstrap/css/bootstrap-theme.min.css">
</head>
<body>
<nav class="navbar navbar-inverse navbar-static-top">
<div class="container">
<div class="navbar-header">
<a class="navbar-brand" href="#">BookInfo Sample</a>
</div>
<button type="button" class="btn btn-default navbar-btn navbar-right" data-toggle="modal" href="#login-modal">Sign
in</button>
</div>
</nav>
<!---
<div class="navbar navbar-inverse navbar-fixed-top">
<div class="container">
<div class="navbar-header pull-left">
<a class="navbar-brand" href="#">Microservices Fabric BookInfo Demo</a>
</div>
<div class="navbar-header pull-right">
<button type="button" class="navbar-toggle" data-toggle="collapse" data-target=".navbar-collapse">
<span class="icon-bar"></span>
<span class="icon-bar"></span>
<span class="icon-bar"></span>
</button>
</div>
<div class="navbar-collapse collapse">
<button type="button" class="btn btn-default navbar-btn pull-right" data-toggle="modal" data-target="#login-modal">Sign in</button>
</div>
</div>
</div>
-->
<div id="login-modal" class="modal fade" role="dialog">
<div class="modal-dialog">
<div class="modal-content">
<div class="modal-header">
<button type="button" class="close" data-dismiss="modal">×</button>
<h4 class="modal-title">Please sign in</h4>
</div>
<div class="modal-body">
<form method="post" action='login' name="login_form">
<p><input type="text" class="form-control" name="username" id="username" placeholder="User Name"></p>
<p><input type="password" class="form-control" name="passwd" placeholder="Password"></p>
<p>
<button type="submit" class="btn btn-primary">Sign in</button>
<button type="button" class="btn btn-default" data-dismiss="modal">Cancel</button>
</p>
</form>
</div>
</div>
</div>
</div>
<div class="container-fluid">
<div class="row">
<div class="col-md-12">
<h3 class="text-center text-primary">The Comedy of Errors</h3>
<p>Summary: <a href="https://en.wikipedia.org/wiki/The_Comedy_of_Errors">Wikipedia Summary</a>: The Comedy of Errors is one of <b>William Shakespeare's</b> early plays. It is his shortest and one of his most farcical comedies, with a major part of the humour coming from slapstick and mistaken identity, in addition to puns and word play.</p>
</div>
</div>
<div class="row">
<div class="col-md-6">
<h4 class="text-center text-primary">Book Details</h4>
<dl>
<dt>Type:</dt>paperback
<dt>Pages:</dt>200
<dt>Publisher:</dt>PublisherA
<dt>Language:</dt>English
<dt>ISBN-10:</dt>1234567890
<dt>ISBN-13:</dt>123-1234567890
</dl>
</div>
<div class="col-md-6">
<h4 class="text-center text-primary">Book Reviews</h4>
<blockquote>
<p>An extremely entertaining play by Shakespeare. The slapstick humour is refreshing!</p>
<small>Reviewer1</small>
<font color="black">
<!-- full stars: -->
<span class="glyphicon glyphicon-star"></span>
<span class="glyphicon glyphicon-star"></span>
<span class="glyphicon glyphicon-star"></span>
<span class="glyphicon glyphicon-star"></span>
<span class="glyphicon glyphicon-star"></span>
<!-- empty stars: -->
</font>
</blockquote>
<blockquote>
<p>Absolutely fun and entertaining. The play lacks thematic depth when compared to other plays by Shakespeare.</p>
<small>Reviewer2</small>
<font color="black">
<!-- full stars: -->
<span class="glyphicon glyphicon-star"></span>
<span class="glyphicon glyphicon-star"></span>
<span class="glyphicon glyphicon-star"></span>
<span class="glyphicon glyphicon-star"></span>
<!-- empty stars: -->
<span class="glyphicon glyphicon-star-empty"></span>
</font>
</blockquote>
</div>
</div>
</div>
<!-- Latest compiled and minified JavaScript -->
<script src="static/jquery.min.js"></script>
<!-- Latest compiled and minified JavaScript -->
<script src="static/bootstrap/js/bootstrap.min.js"></script>
<script type="text/javascript">
$('#login-modal').on('shown.bs.modal', function () {
$('#username').focus();
});
</script>
</body>
</html>Changing node port associated with the ingress gateway
If you want to change the node port associated with ingress gateway edit the ingress gateway service istio-ingressgateway.
Find the port INGRESS_PORT value in the vi editor.
$ echo $INGRESS_PORT
30497
$ echo $SECURE_INGRESS_PORT
32479
Lines abbreviated for clarity, in our example we will change 30497 to 30080 (the new nodeport you want to expose out from cluster)
$ kubectl edit service istio-ingressgateway -n istio-system...
- name: http2
nodePort: <CHANGE-ME>
port: 80
...Type :wq to save and quit
service/istio-ingressgateway editedNow let’s test this with a web browser.
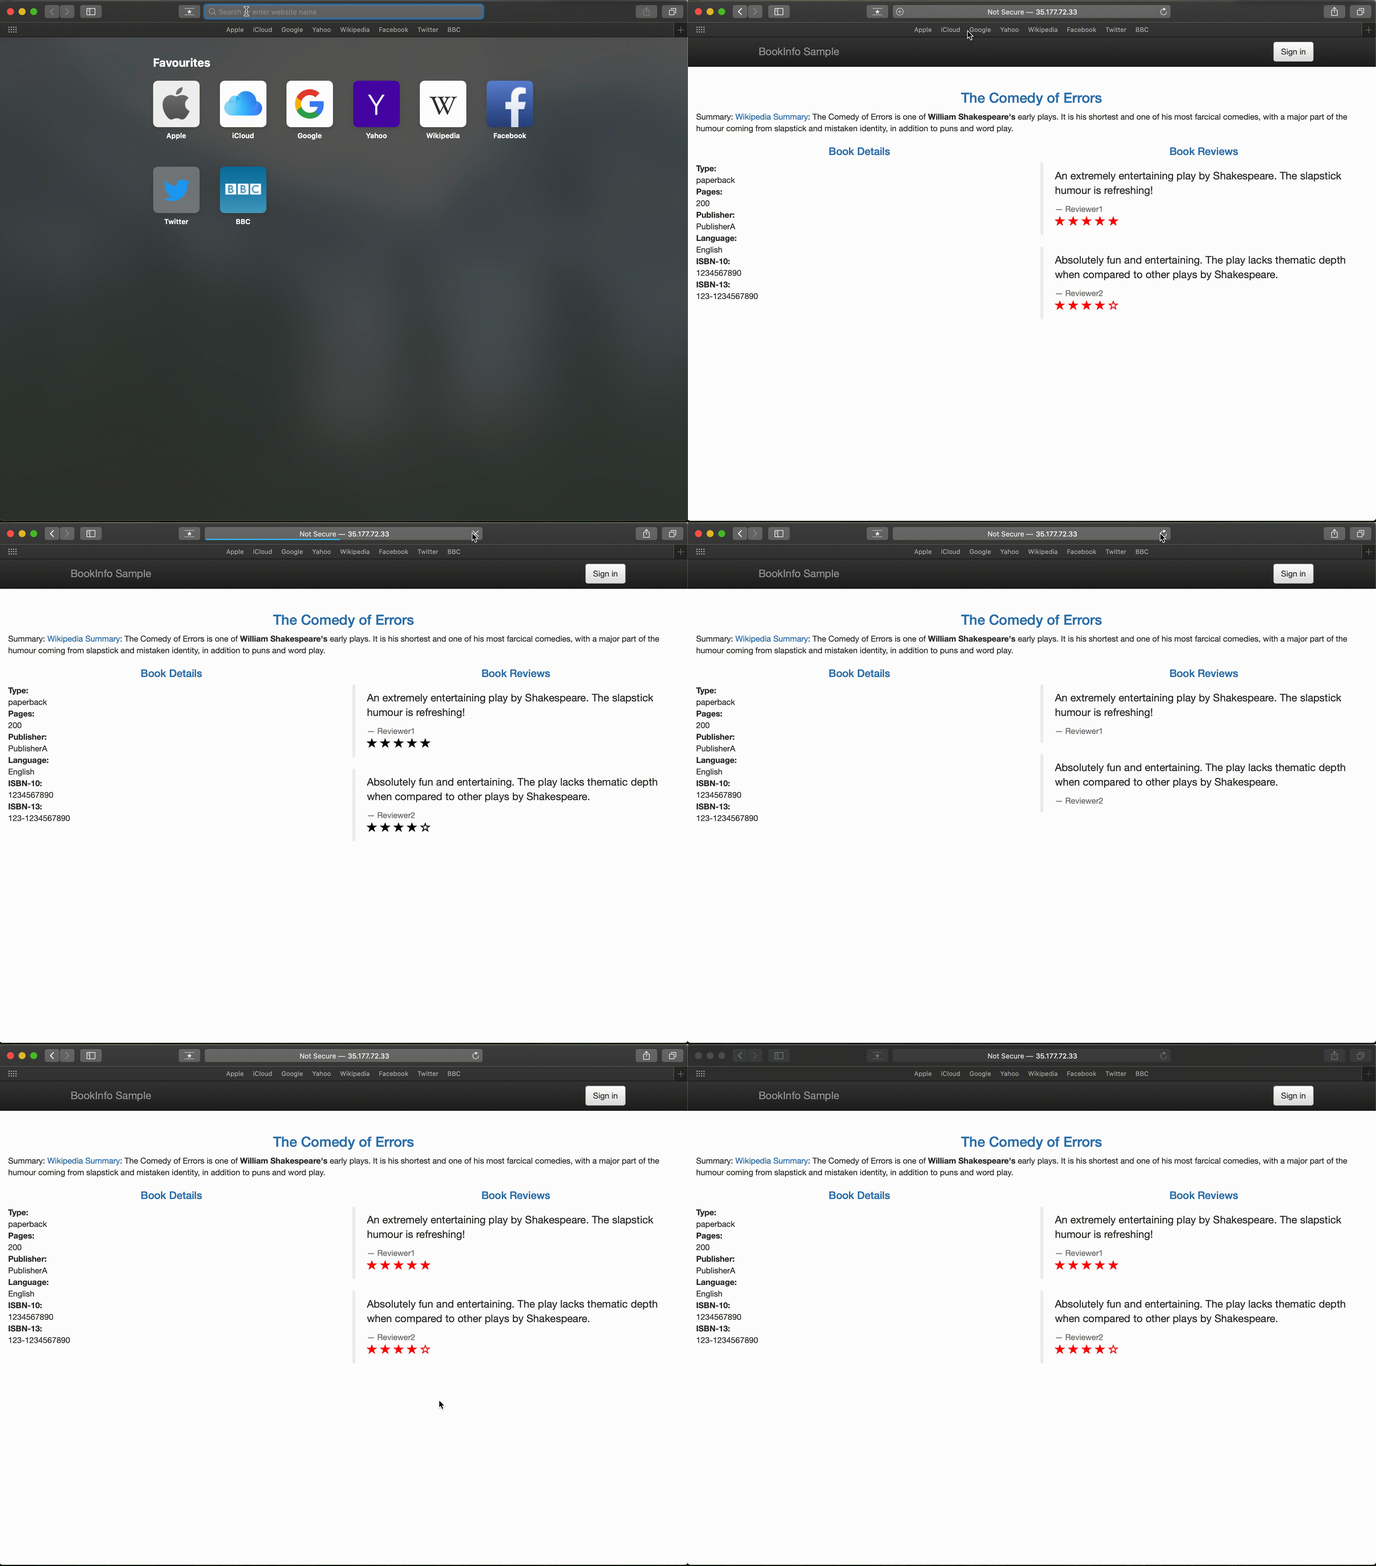
Looks like Istio doing it’s thing.
Now how about we want to visualise Istio service mesh so we can see how the service mesh is working. To do this we will use Kiali, this is an opensource visualisation tool that will show us what Istio is upto.
$ istioctl install --set values.kiali.enabled=true
Detected that your cluster does not support third party JWT authentication. Falling back to less secure first party JWT. See https://istio.io/docs/ops/best-practices/security/#configure-third-party-service-account-tokens for details.
✔ Istio core installed
✔ Istiod installed
✔ Addons installed
✔ Ingress gateways installed
- Pruning removed resources                                                                                                                                                                Pruned object PodDisruptionBudget:istio-system:istio-egressgateway.
  Pruned object Deployment:istio-system:istio-egressgateway.
  Pruned object Deployment:istio-system:grafana.
  Pruned object Deployment:istio-system:istio-tracing.
  Pruned object Service:istio-system:grafana.
  Pruned object Service:istio-system:jaeger-agent.
  Pruned object Service:istio-system:jaeger-collector.
  Pruned object Service:istio-system:jaeger-collector-headless.
  Pruned object Service:istio-system:jaeger-query.
  Pruned object Service:istio-system:tracing.
  Pruned object Service:istio-system:zipkin.
  Pruned object Service:istio-system:istio-egressgateway.
  Pruned object ConfigMap:istio-system:istio-grafana.
  Pruned object ConfigMap:istio-system:istio-grafana-configuration-dashboards-istio-mesh-dashboard.
  Pruned object ConfigMap:istio-system:istio-grafana-configuration-dashboards-istio-performance-dashboard.
  Pruned object ConfigMap:istio-system:istio-grafana-configuration-dashboards-istio-service-dashboard.
  Pruned object ConfigMap:istio-system:istio-grafana-configuration-dashboards-istio-workload-dashboard.
  Pruned object ConfigMap:istio-system:istio-grafana-configuration-dashboards-mixer-dashboard.
  Pruned object ConfigMap:istio-system:istio-grafana-configuration-dashboards-pilot-dashboard.
  Pruned object Secret:istio-system:kiali.
  Pruned object ServiceAccount:istio-system:istio-egressgateway-service-account.
  Pruned object PeerAuthentication:istio-system:grafana-ports-mtls-disabled.
✔ Installation complete
Let’s verify that Kiali service is running
$ kubectl -n istio-system get svc kiali
NAME    TYPE        CLUSTER-IP       EXTERNAL-IP   PORT(S)     AGE
kiali   ClusterIP   10.152.183.119   <none>        20001/TCP   13h
Next let’s setup variables to create Kiali secrets
$ NAMESPACE=istio-system

$ KIALI_USERNAME=$(read -p 'Kiali Username: ' uval && echo -n $uval | base64)
Kiali Username: admin

$ KIALI_PASSPHRASE=$(read -sp 'Kiali Passphrase: ' pval && echo -n $pval | base64)
Kiali Passphrase: $
Configure secret for Kiali
cat <<EOF | kubectl apply -f -
apiVersion: v1
kind: Secret
metadata:
  name: kiali
  namespace: $NAMESPACE
  labels:
    app: kiali
type: Opaque
data:
  username: $KIALI_USERNAME
  passphrase: $KIALI_PASSPHRASE
EOF
secret/kiali created
Now run kiali dashboard and have it listen on port that is accessible on the node.
$ istioctl dashboard kiali --address 172.31.33.27 --port 30000
http://localhost:30000/kiali
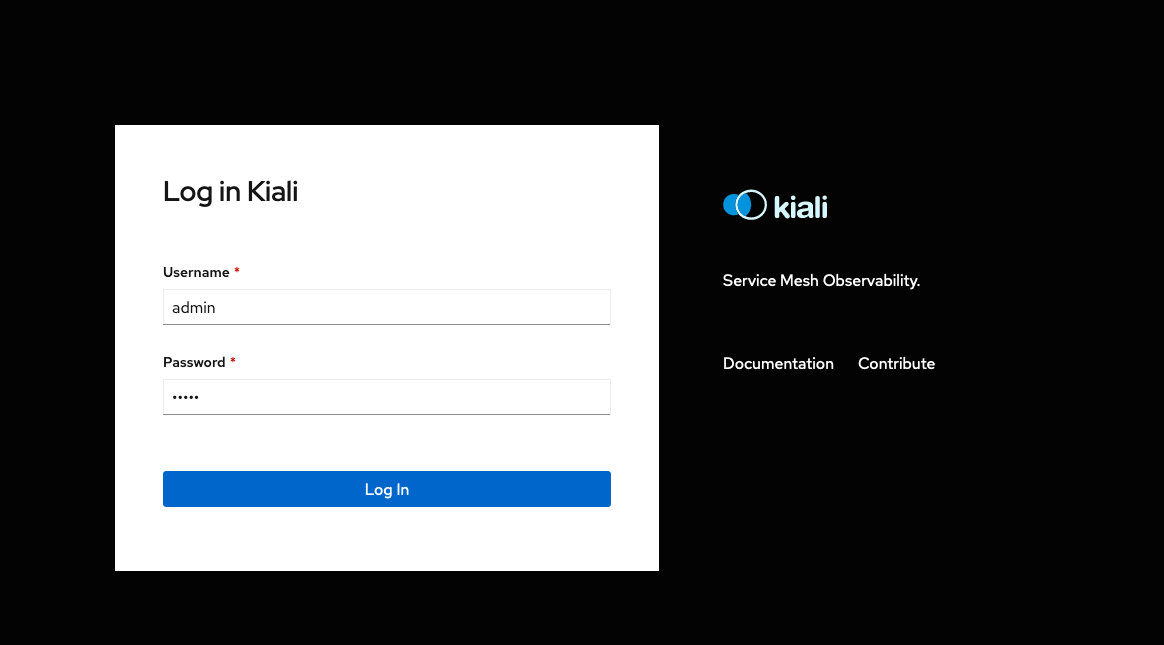
We are now able to login to the kiali dashboard,
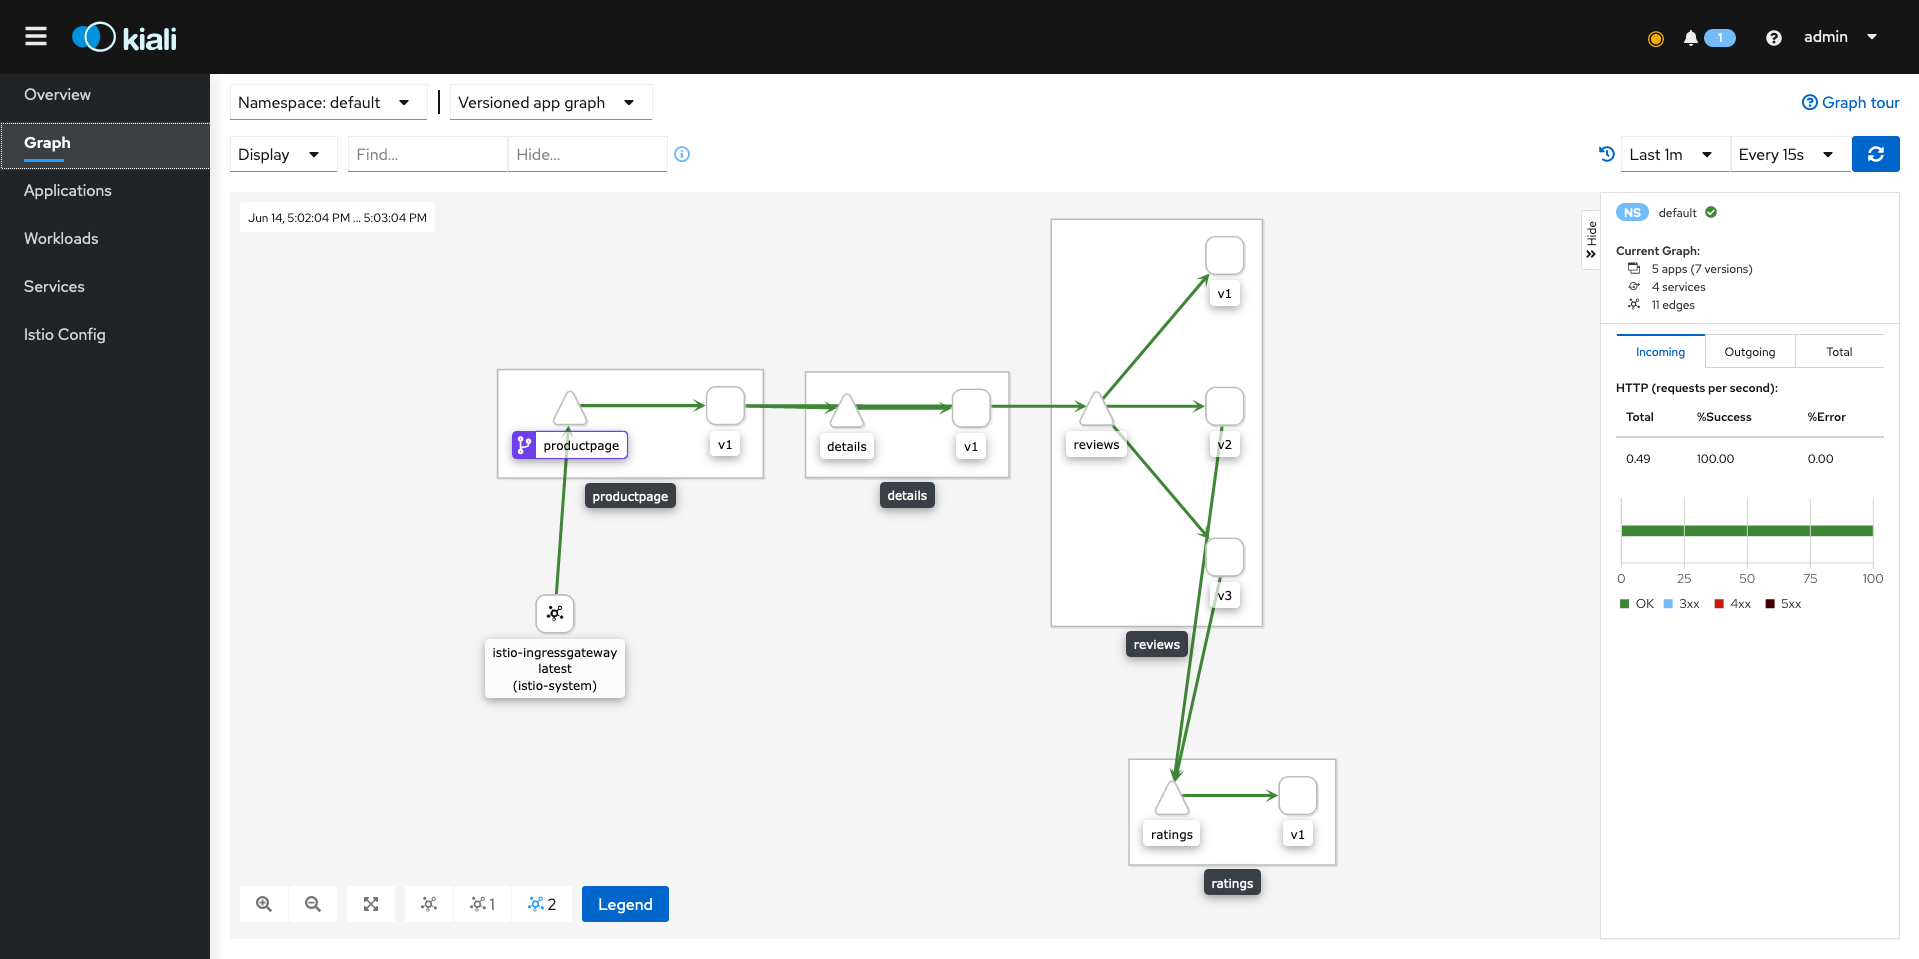
After we authenticate successfully we can see the graphs related to our application
